

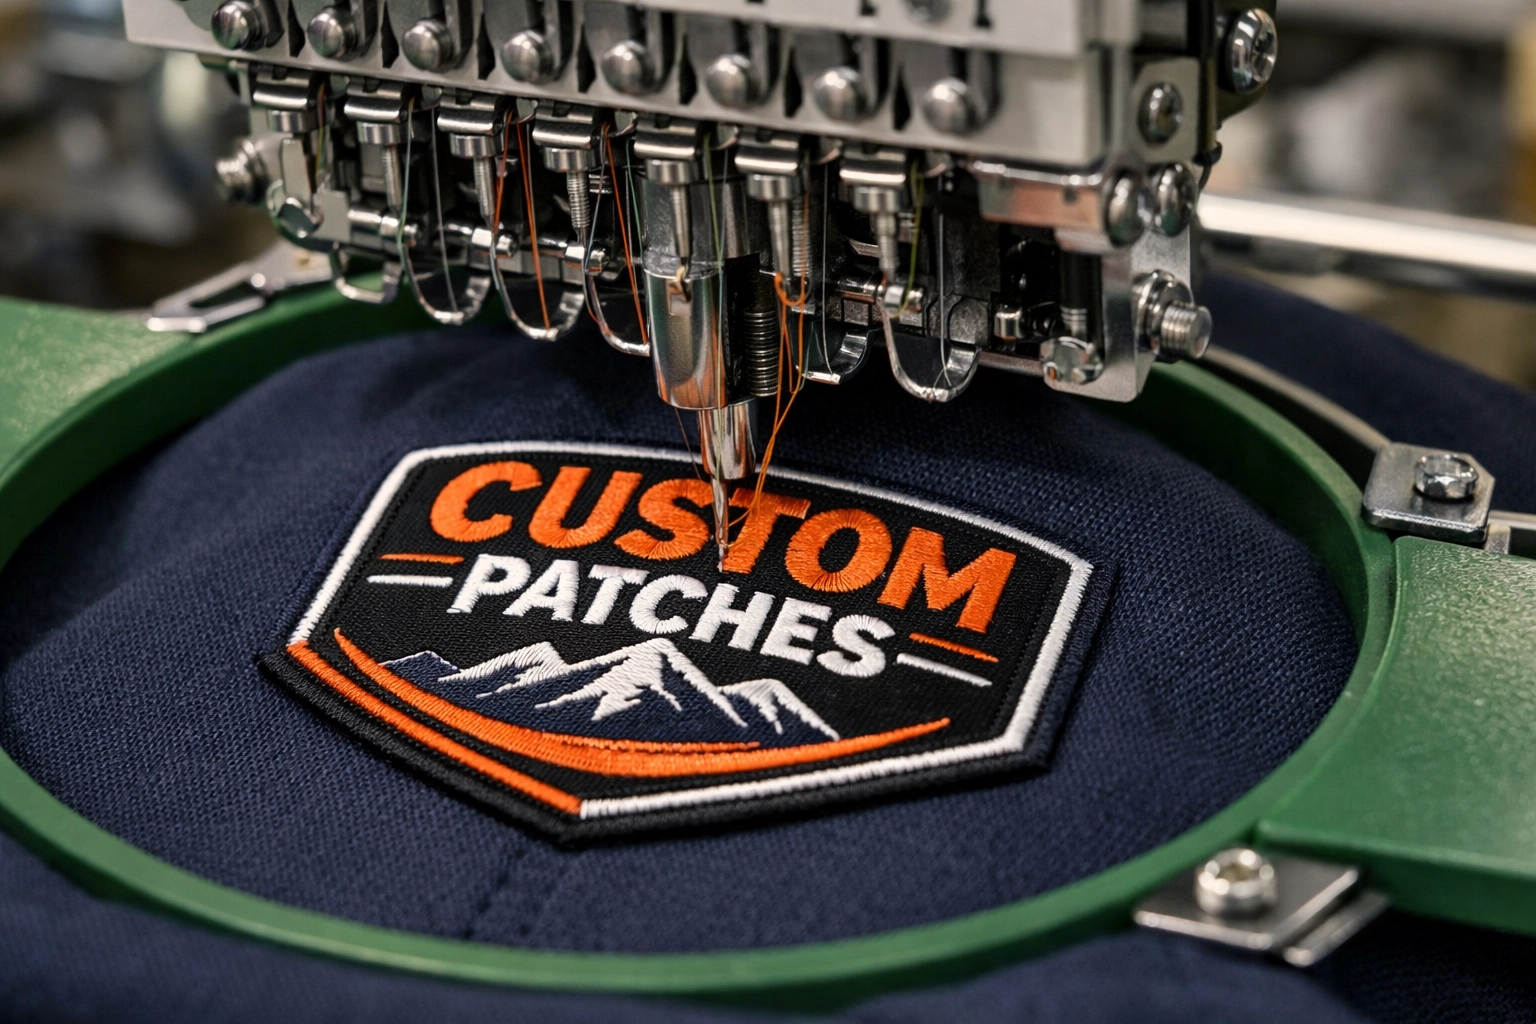
Ever wonder why some custom patches embroidery looks crisp and professional while others look like a craft project gone wrong? The difference isn't magic: it's mastering a few key techniques that separate amateur work from expert-level results.
If you've been searching for "embroidery near me" and getting wildly different quality, you're not alone. Let's pull back the curtain on what really makes custom patches stand out.
The Stitch Density Secret Nobody Talks About
Here's the truth: stitch density makes or breaks your patch. Too many stitches, and your design becomes stiff and puckers like a bad shirt after laundry. Too few, and the details vanish completely.
Professional embroiderers know the sweet spot. They adjust density based on:
- Fabric type and thickness
- Design complexity and size
- Thread weight being used
- Final application and durability needs
This single factor determines whether your patch looks homemade or high-end. Most beginners either crank the density up thinking "more is better" or leave it too sparse trying to save time.
Why Underlay Stitches Are Your Best Friend
Think of underlay as the foundation of a house. You can't see it in the final product, but without it, everything falls apart. Underlay stitches stabilize your design and prevent the fabric from shifting during the embroidery process.
Professional patches always include proper underlay because:
- It creates a stable base for top stitches
- Prevents fabric from showing through
- Reduces puckering and distortion
- Increases overall patch durability
The border is equally critical. A satin stitch border wider than 3mm locks everything down and creates that polished edge you see on premium patches.
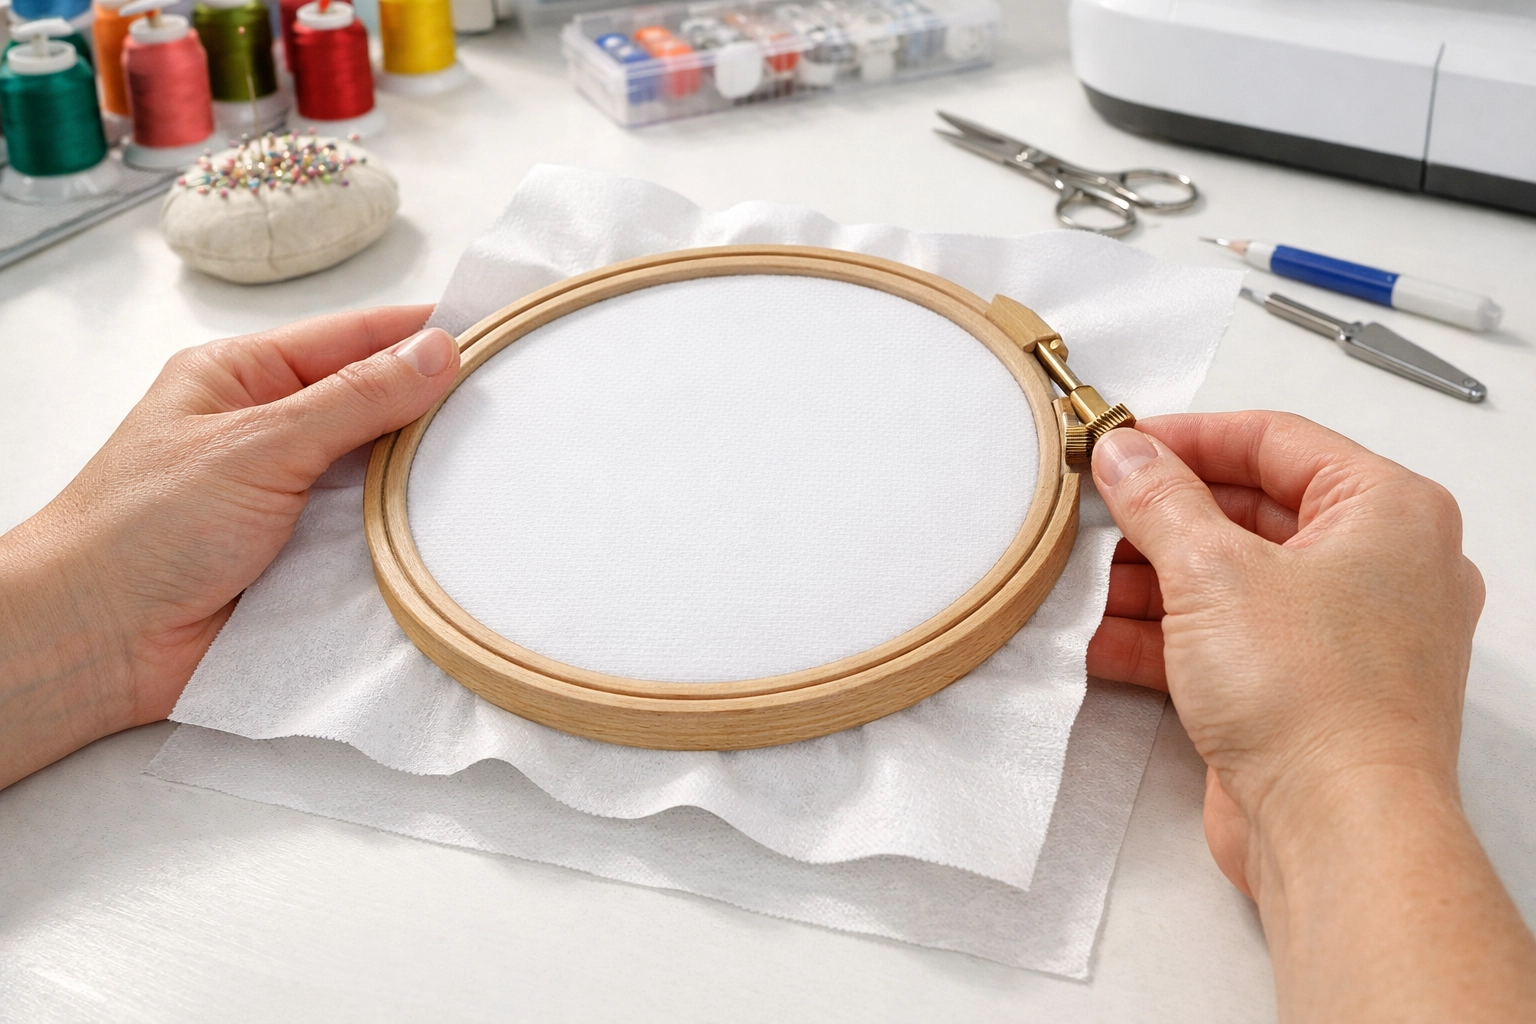
The Hooping Technique That Changes Everything
Here's a secret: precise hooping matters more than expensive machines. Every single stitch needs to land exactly where it's supposed to, and that starts with keeping your fabric perfectly taut and aligned.
Professional embroiderers use specific hooping strategies:
- Magnetic hoops for even tension distribution
- Multiple hooping for larger or complex designs
- Fabric alignment guides for consistency
- Proper stabilizer placement before hooping
Sloppy hooping causes registration issues where elements don't line up. It's the fastest way to turn a great design into a disaster.
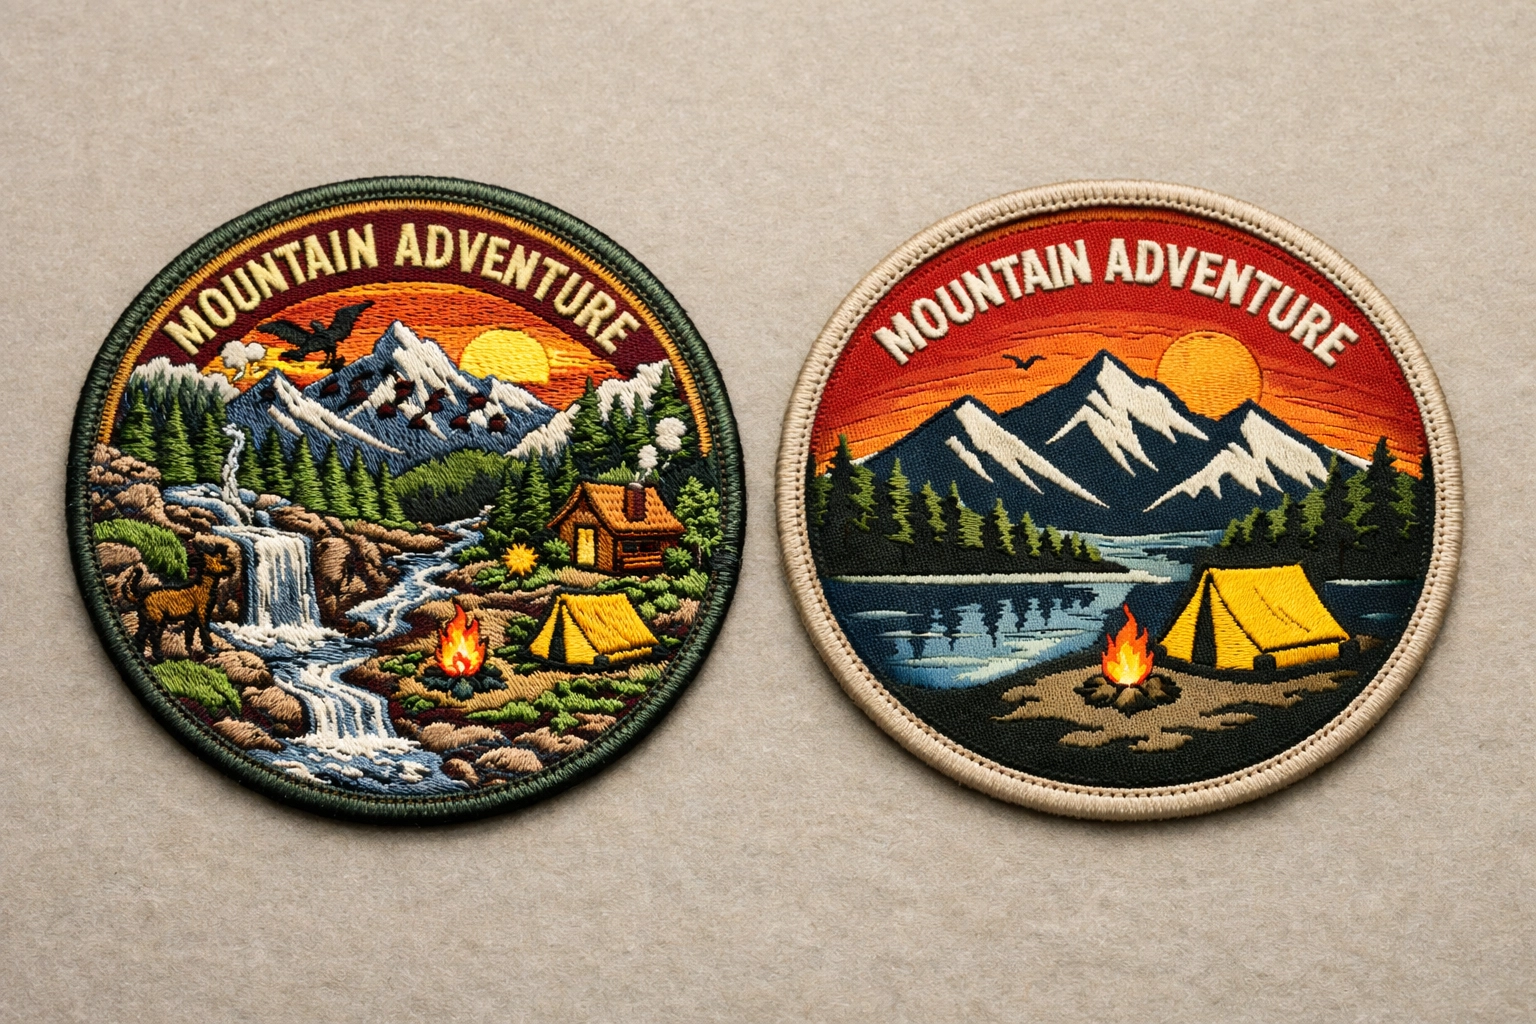
Design Simplicity Beats Complexity Every Time
Want to know what separates professionals from amateurs? Professionals know when to simplify. Intricate patterns might look amazing on screen, but they create nightmare scenarios when translated to thread.
Keep your custom patches embroidery designs clear and readable:
- Avoid tiny text under 0.25 inches
- Limit fine details that won't render well
- Use bold, simple fonts
- Reduce the number of color changes
Remember: what works in graphic design doesn't always work in embroidery. Thread has physical limitations that pixels don't.
The Color Contrast Trick Pros Always Use
Dark blue text on black fabric sounds sophisticated until you realize nobody can read it from three feet away. Strategic color contrast isn't just aesthetic: it's functional.
Professional patches leverage high contrast because:
- Designs remain visible from a distance
- Text stays legible at smaller sizes
- Colors don't blend together during production
- Final patches photograph better
White on black, gold on navy, red on white: these classic combinations work because they create clear visual separation. If you're unsure, test your color choices by viewing them on a phone screen from across the room.
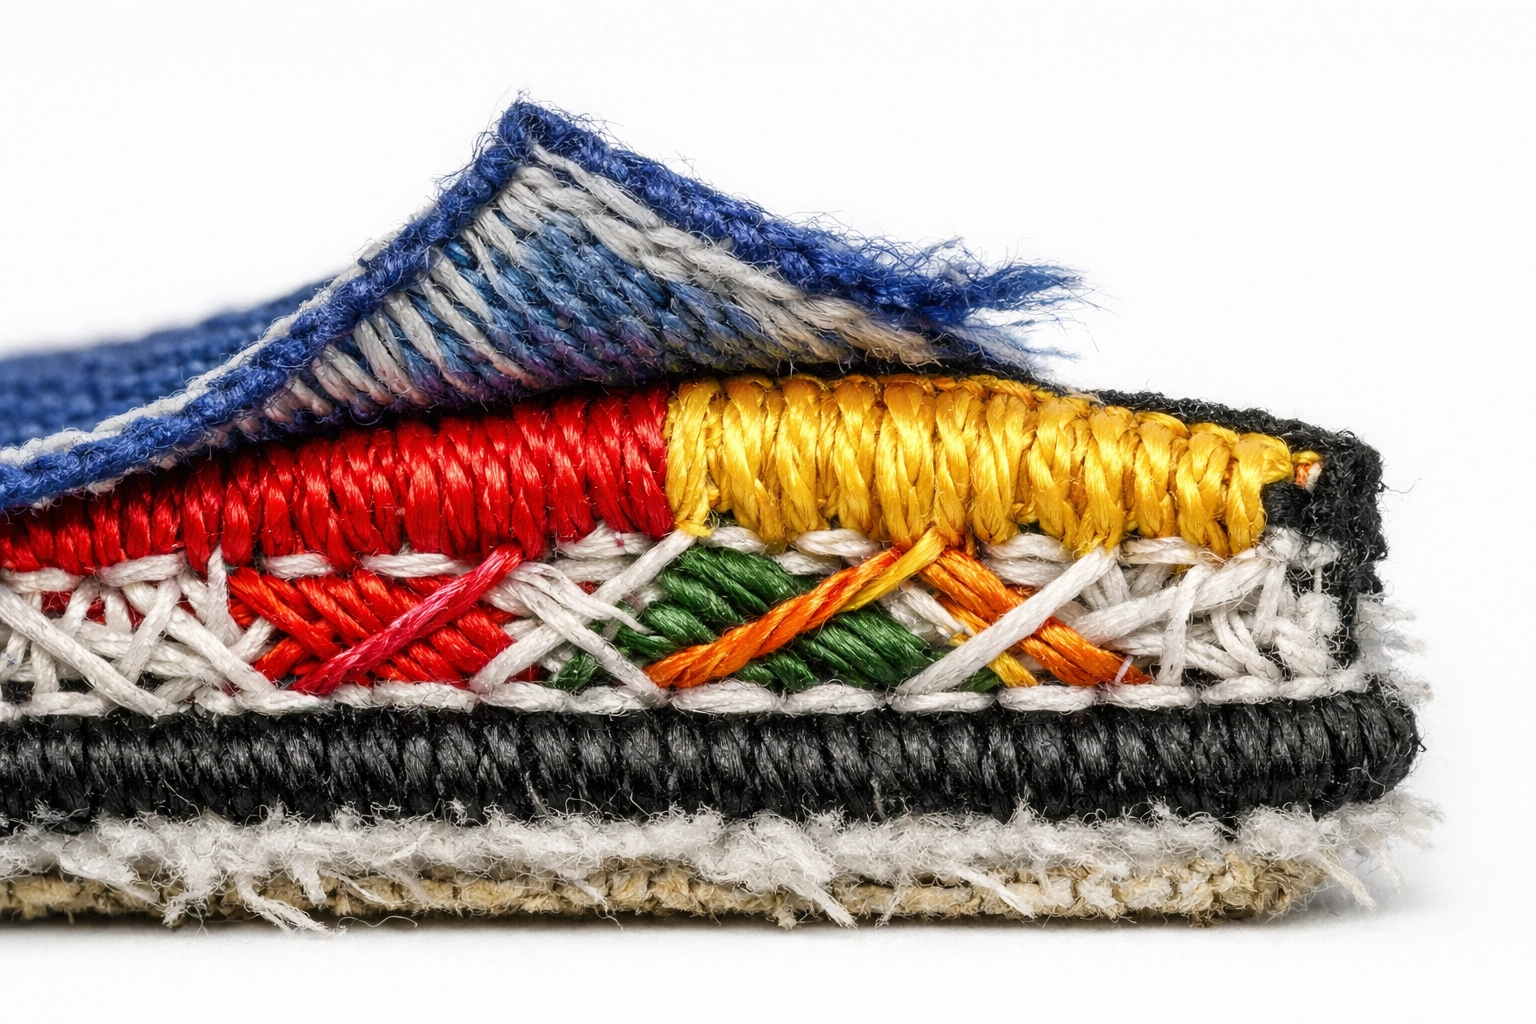
Merrowing: The Edge Technique That Screams Quality
Ever notice how vintage scout badges have that distinctive chunky border? That's merrowing: a specialized overlock technique that wraps the patch edge in continuous thread. It's the hallmark of professional custom patches embroidery.
True merrowing requires dedicated machinery. However, skilled digitizers can create convincing faux-merrow effects using:
- Dense zigzag stitching patterns
- Motif stitches arranged strategically
- Multiple pass techniques
- Careful color matching
The right edge treatment transforms a basic patch into something that feels premium and durable.
Stabilizer Selection: The Foundation Nobody Sees
Choosing the wrong stabilizer is like building on quicksand. Your stabilizer must match your design's weight and complexity, or everything shifts during production.
Professional embroiderers select stabilizers strategically:
- Tearaway: Clean edges for lightweight designs
- Water-soluble: Disappears completely for delicate work
- Cutaway: Heavy-duty support for dense designs
- Heat-away: Specialty applications requiring total removal
The stabilizer must cover the entire embroidery area. Skimping here saves pennies but costs you in quality.
Testing: The Step That Separates Pros from Pretenders
Here's the secret pros don't advertise: they test everything. Every single design gets a trial run on scrap fabric before touching the final product. This catches problems early when they're easy to fix.
Smart testing protocols include:
- Running designs at various speeds
- Adjusting pull compensation based on results
- Fine-tuning density and underlay settings
- Checking thread tension and needle condition
Starting with slow stitch speeds for complex designs prevents thread breaks and registration issues. You can always speed up once you've confirmed everything works.
Batch Production Secrets for Consistent Results
When producing multiple patches, professionals use larger hoops with careful spacing. This maximizes efficiency while maintaining quality. The key is avoiding overlap while minimizing fabric waste.
Production best practices include:
- Template creation for consistent placement
- Color-coded thread charts for quick changes
- Sequential production planning
- Quality checkpoints throughout the run
Consistency matters when you're producing dozens or hundreds of patches. One setup error multiplies across the entire batch.

Why Choose Professional Custom Patches Embroidery?
Now you know the secrets. But here's the reality: mastering these techniques takes years of practice and significant equipment investment. That's where working with experienced professionals makes sense.
At Truth Be Told Apparel, we've spent decades perfecting these techniques. We handle everything from design optimization to final production, ensuring your patches look exactly how you envisioned.
Ready to Create Professional Custom Patches?
Whether you need patches for your team, business, or special event, quality matters. The difference between amateur and professional custom patches embroidery comes down to mastering these technical elements.
Stop settling for mediocre patches. Contact us today to discuss your project, or check out our custom patches services to see what's possible.
When you search "embroidery near me," you deserve results that exceed expectations. Let's create patches that make an impact.

